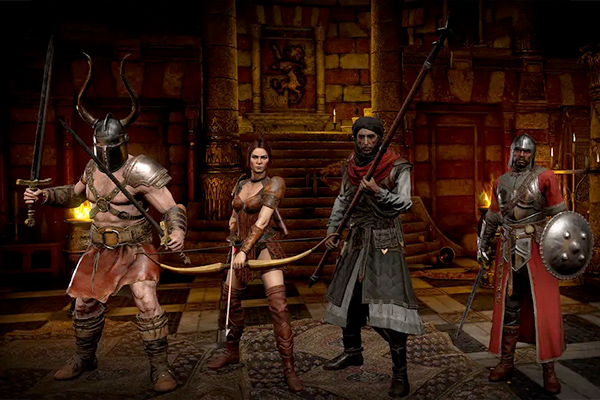
 In D2R endgame farming, your merc is not a side character. It is your uptime engine. If you are pushing Terror Zones, hunting Heralds, and trying to keep a tight loop for Sunder Charm attempts, you win by staying in motion and deleting elite packs without stalls. A merc that dies, whiffs, or fails to add real utility will quietly destroy your runs even if your Warlock build is strong. This is why the real “merc meta” question is not only about damage. It is reliability, aura value, crowd control, and how often your merc turns bad elite spawns into clean kills. Act 2 is still the default pick for most ladders because auras scale every second you play, but Act 1 can outperform in specific setups where safe ranged behavior and consistent procs matter more than raw aura stacking. The runeword choice is the next layer. Pride, Insight, Doom, and BOTD do very different jobs, and choosing the wrong one can lock you into slow fights, mana breaks, or awkward immunity matchups. This guide gives you a practical decision model: first, choose the merc type that matches your Warlock damage profile, then choose the aura package you need, then pick the runeword that supports your farming goal.
Act 1 Vs Act 2 Mercenary
Act 1 and Act 2 mercs solve different problems. Act 2 gives you a permanent aura platform that boosts damage or control in every fight, which is why it dominates general D2R guide recommendations. The value is not just the aura’s tooltip. It is the fact that you are always benefiting while you move, while you reposition, and while you focus fire the Herald target. When your goal is Herald farming, that persistent value compounds across an hour. Act 1 competes by behaving safer in chaotic pack scenarios and by applying ranged pressure from angles that melee mercs cannot hold. In dense Terror Zones, a melee merc can get stuck, body blocked, or forced into dangerous aura enchanted situations. Act 1 often survives those moments more cleanly, which can matter if your Warlock build is already self sufficient on damage and only needs a stable partner that stays alive. If your runs are slowed by merc deaths and resurrection trips, Act 1 becomes more attractive. If your runs are slowed by damage breakpoints, immunity grind, or slow boss phases, Act 2 usually wins. Your correct choice depends on what breaks your tempo most often.
Aura Selection: Might, Holy Freeze, and The Real Priorities
Aura choice is a farming decision, not a style preference. Might is the classic aura for physical heavy setups and merc damage scaling. It shines when your Warlock build either leans into physical hits, benefits from stronger merc leech sustain, or needs faster elite deletes on targets that resist your main element. Holy Freeze is a control aura that buys safety and stabilizes chaotic density zones, especially when you are learning routes or when your build can already kill fast but occasionally gets swarmed or clipped by dangerous modifiers. The hidden value of Holy Freeze is smoother movement. Packs slow, your positioning becomes easier, and your potion usage drops. That stability can raise your actual kills per minute even if raw DPS is slightly lower. In Herald hunts, the best aura is often the one that prevents a 20 second mess. You do not need the maximum theoretical damage if it creates deaths or resets. If you are chasing consistent Terror Zone uptime, pick the aura that reduces downtime first, then optimize damage. Once your runs are clean, you can pivot back toward damage auras and more aggressive merc weapons.
Pride
D2R Pride is a premium merc runeword because its main value is not the weapon damage. It is Concentration aura, which boosts physical damage and can turn a physical leaning setup into a much faster elite killer. Pride makes the most sense when your Warlock build or party composition benefits heavily from physical scaling, and when you already have solved mana and survivability in other slots. Pride also pairs well with strategies that aim to shred elites quickly rather than control them, because you are investing into output rather than safety. The downside is opportunity cost. Pride is expensive and it does not automatically solve the common problems that slow Herald farming, such as mana breaks, merc survivability, or crowd control. It is also a worse choice if your Warlock damage is mostly non physical and you are not leveraging the aura meaningfully. In that case, you are paying for an aura your build does not convert into speed. Pride is best described as an optimal tool for builds that already have smooth runs and want to compress kill time on elites and Herald targets. If your runs are not stable yet, Pride can be a trap purchase.
Insight
D2R Insight remains one of the strongest merc choices in D2R farming because it attacks the most common hidden bottleneck: mana downtime. Every time you stop casting, you lose elite kills, lose trigger progress, and lose Herald attempts. Insight turns many Warlock setups into nonstop clearing machines, and it does that without requiring perfect gear elsewhere. It is also flexible. You can run Insight early ladder, mid ladder, and even late ladder if your build values constant casting more than maximum damage. The main limitation is that Insight is not a damage aura weapon. It is a rhythm weapon. If your Warlock build already has near infinite mana, Insight becomes less valuable and you might switch to a weapon that improves immunities, control, or raw kill speed. For most players trying to grind Terror Zones efficiently, Insight is the best first answer because it removes the most frequent reason runs slow down. It also keeps your merc relevant because a merc that stays alive while providing Meditation is already generating value even when it is not landing every hit.
Doom
D2R Doom is about control and safety, and it earns its place when your farming routes include dense, dangerous zones where a single mistake can kill your tempo. Doom provides a powerful slowing effect through Holy Freeze, which stacks into a play pattern that is calmer and more predictable. This matters in Herald farming because you often fight in imperfect terrain. You might be pushing forward fast, you might get jumped by multiple elite packs, and you might need space to reposition or to set up your burst rotation. Doom helps you create that space without relying on perfect micro. It is also valuable when your Warlock build can kill quickly but suffers from being touched by fast melee packs, ranged volleys, or nasty modifier combinations. Doom reduces the chance that a fight spirals into pot spam, reposition loops, or merc deaths. The tradeoff is that Doom is not the top raw DPS choice, and if your build already has strong control tools, you might get more value from a damage oriented merc weapon. Doom is best when you want consistency across all Terror Zone rolls, not only the easy ones.
BOTD
Breath of the Dying is the simplest concept of the four: big physical damage, strong leech potential, and a merc that can actually win melee exchanges. D2R BOTD is attractive when your Warlock build needs the merc to be a real damage contributor, especially against targets that resist your primary damage type or that take too long to kill with your main kit. BOTD can also be a strong quality of life choice because a merc that hits hard and leeches well stays alive more often in normal fighting, which reduces resurrection downtime. The downside is that BOTD does not automatically provide the utility layers that make Herald farming smooth, such as mana sustain or crowd control. If your runs slow down because you run out of mana or because packs overwhelm you, D2R BOTD is not fixing the root cause. It is a damage upgrade. It becomes a great pick once your Warlock build has already solved sustain and control through other means, and you want your merc to clean up immunities and delete stragglers. BOTD is also a strong option in setups where you want merc damage to matter on bosses without changing your own gear.
Decision Guide
| Goal | Best Merc Pick | Aura Priority | Runeword Priority | Why It Wins For Herald Farming |
|---|---|---|---|---|
| Fastest overall tempo | Act 2 | Any, depends on build | Insight | Removes mana breaks and keeps clears nonstop |
| Maximum physical scaling | Act 2 | Might | Pride | Concentration boosts physical output across elites and Heralds |
| Safest dense Terror Zones | Act 2 | Holy Freeze | Doom | Slows packs, stabilizes positioning, reduces deaths |
| Merc must carry damage | Act 2 | Might or Holy Freeze | BOTD | High damage plus leech improves merc survivability and cleanup |
| Merc deaths are your bottleneck | Act 1 or Act 2 | Control first | Doom or Insight | Ranged safety or control reduces resets and town trips |
Act 1 Merc Builds
Act 1 shines when the battlefield punishes melee AI. If your Terror Zone rotation regularly puts you into narrow corridors, ranged heavy monster sets, or elite combinations that melt a melee merc, Act 1 can be the stability pick that raises your real farming speed. A ranged merc often stays engaged without walking into every hazard, and that alone can reduce the number of runs that get derailed. Act 1 also works well when your Warlock kit already provides the main damage and you only need a partner that stays alive while adding chip damage, procs, or utility. The main issue is that Act 1 does not give you the same aura platform as Act 2, so you need to be honest about what you are giving up. If your Warlock build is still gearing up and relies on aura boosts to hit breakpoints, Act 2 will usually outperform. If your Warlock build is already geared and the only thing slowing you is chaos, Act 1 becomes a real alternative. The best way to decide is to track one thing for an hour: how many times did your merc die, and how many minutes did that cost.
How To Choose Without Overthinking
You do not need a spreadsheet to pick a merc meta setup. You need a simple order of operations that matches Herald farming reality. First identify what breaks your runs. If you stop casting, choose Insight. If you die or get swarmed, choose Doom or a control aura setup. If you are stable but kills are slow, choose Pride for physical scaling or BOTD for merc damage depending on your build type. The second step is to lock your merc survivability baseline so you are not testing runewords on a merc that cannot live. A merc that falls over makes every runeword look bad. The third step is to commit long enough to judge properly, because one lucky or unlucky Terror Zone is not a valid test.
Simple picklist:
- "Mana problems: Insight first"
- "Safety problems: Doom or Holy Freeze focus"
- "Damage problems after stability: Pride for physical scaling or BOTD for merc carry damage"
Conclusion
Warlock merc meta in D2R Season 13 is about uptime. Act 2 is the default because aura value is constant and scales with every second you spend in Terror Zones, while Act 1 can win when ranged survival and consistent engagement prevent run breaking deaths. Insight is the tempo monster for most farming loops because it deletes mana downtime. Doom is the control and safety tool that stabilizes dense zones and ugly elite rolls. Pride is the physical scaling choice for builds that actually convert Concentration into faster kills, and it is best once your runs are already clean. BOTD is the raw damage option when you need your merc to fight, leech, and finish targets your Warlock kit does not delete fast enough. Pick based on what slows you down most often, fix that first, then optimize for damage.
How it works
Sell to us
Sell your items with a few easy steps and get paid in MuleCredits immedately. Credits can be cashed out or spent in our shop.
More articles on this topic
- Colossal Ancients Difficulty Increase in D2R Season 14: What to Expect
- Diablo II: Resurrected Ladder Season 14 Patch 3.2 Summary
- Sunder Charm Farming After D2R Patch 3.2
- Terror Zone Changes in Diablo II: Resurrected Season 14
- Diablo 2 Resurrected Crafting Guide for Beginners
- D2R Socketing Guide: Larzuk Vs Cube Recipe And When To Use Each One
- D2R: RotW Season 13 Meta After One Month
- Magic Warlock Endgame Farming Guide